Preview PNG vs transparent overlay: which should you export?
Export a preview PNG when you want a still image with the source and guide already combined. Export an overlay PNG when you need a transparent guide above editable footage. Hide that guide before exporting your finished Short.
What our two exports actually contain
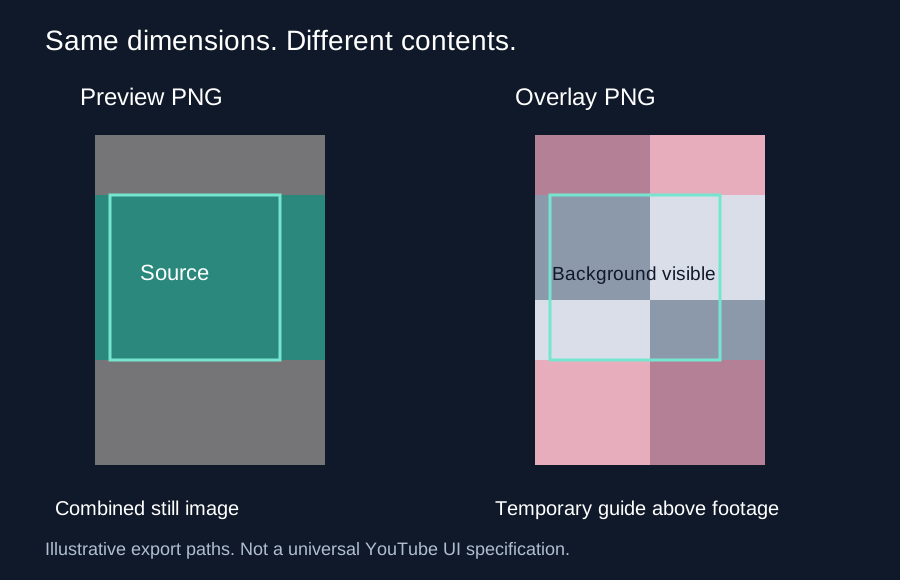
We tested Short Frame Check with the same locally loaded 540 × 960 PNG, safe-zone shading enabled, opacity at 35%, and the caption reference disabled. Both downloaded files had 540 × 960 pixels and RGBA channels. Equal dimensions did not mean equal content.
At coordinate (270, 384), the preview pixel was RGBA (43, 136, 125, 255); the overlay pixel was (0, 0, 0, 0). The overlay center was completely transparent, while the preview contained the source image. At coordinate (10, 10), the preview was (104, 62, 82, 255), and the overlay was (255, 80, 109, 89). These are decoded pixel readings from our own downloads, not measurements of YouTube’s interface.
Why the shaded edge is not fully opaque
The tool draws red shading with alpha equal to the opacity slider divided by 100. For this test, 35 ÷ 100 × 255 = 89.25; the exported PNG sample had alpha 89. A fully transparent pixel has alpha 0; an opaque pixel has alpha 255. The green guide border has separate drawing settings, so do not assume every nontransparent pixel shares the shading alpha.
The preview starts by drawing your source image onto the canvas, then draws the guide. The overlay starts with a fresh blank canvas and draws only the guide. In this implementation the overlay export also omits the optional caption reference. Your actual caption remains part of your source only if it was already baked into that source. This difference is useful when deciding what to import into an editor.
A repeatable check before you edit
- Load a portrait source you own and keep the same margins for both downloads.
- Leave Show safe zone enabled. Download preview PNG, then download overlay PNG.
- Open the overlay over a checkerboard or a contrasting background. The interior should reveal that background, not your source photograph.
- Match the overlay’s frame dimensions and alignment to your edit. A mismatched crop or stretch changes where the guide falls.
- Keep the original footage underneath. Disable the guide layer and check the final exported video before uploading.
Turning Show safe zone off leaves the guide-only export blank when no guide is drawn. Increasing opacity affects the shading, not the placement of its boundaries. Neither export moves subtitles in your original file, and exporting from a video saves the currently displayed frame rather than an edited video.
Choose by the next step
| Your next step | Choose |
|---|---|
| Share a still visual check | Preview PNG |
| Arrange captions over editable footage | Overlay PNG as a temporary guide layer |
| Publish the completed Short | Your editor’s video export, with the guide hidden |
Questions and answers
Is the preview PNG a finished Shorts video?
No. It is a still image. A video source produces one frame, not a video file.
Why does my overlay look empty in the middle?
Its interior is transparent by design. Put it above footage to see the footage through it.
Will a transparent overlay disappear automatically from my final export?
No. Transparency reveals the lower layer, but the colored guide can still be visible. Hide or remove that layer before your final export.
Does this prove captions will never be covered?
No. These are adjustable reference margins. Review the finished upload on your phone; devices and interface states can differ.
Open the safe zone tool · Check the whole caption box
Quick visual walkthrough
A short text-led walkthrough, without audio.